Cake Disaster? Turn Crumbled Cake into Delicious Cake Balls
We've all been there. One moment, your kitchen is filled with the hopeful aroma of baking, and you're already picturing that perfectly frosted, Instagram-worthy masterpiece. The next, you're staring at a crumbled mess in the pan, a cake that just refused to cooperate, or perhaps, a beautifully baked creation that simply couldn't hold its form. The frustration is real, the disappointment palpable. You might find yourself frantically googling "why did my cake fall apart?" or, more practically, "what to make when a cake falls apart?" But what if we told you that your baking blunder isn't a failure at all, but rather a delicious opportunity in disguise? Before you reach for the bin or let those tears flow, know that a broken cake is the perfect foundation for an even better, utterly irresistible treat: chocolate peanut butter cake balls. These no-waste wonders are so good, you might just start *accidentally* crumbling cakes on purpose. Yes, really.From Crumbled Catastrophe to Chocolate Peanut Butter Bliss
The concept is simple yet brilliant: take your beautifully baked, albeit broken, cake and transform it into bite-sized spheres of pure joy. This isn't just a solution for a baking mishap; it's a gourmet hack that turns a moment of despair into a celebration of flavor. The combination of rich chocolate cake with creamy, nutty peanut butter is a classic for a reason, and in cake ball form, it reaches new heights of deliciousness. These cake balls are incredibly versatile. Whether your cake was a dark, decadent chocolate, a light and airy vanilla, a playful funfetti, or even just some leftover cupcakes, the principle remains the same. The crumbled cake acts as a blank canvas, ready to soak up the gloriousness of peanut butter. This recipe is an absolute lifesaver for those moments when your cake refuses to unmold, crumbles in your hands, or simply doesn't rise as expected. It's also an ingenious way to use up leftover cake scraps, ensuring every delicious crumb finds its purpose. For a truly irresistible experience, you'll want to dive into our No-Waste Treat: Chocolate Peanut Butter Cake Balls Recipe, which details the full process.Crafting Your Cake Ball Masterpiece: A Step-by-Step Guide
Turning a fallen cake into delectable chocolate peanut butter cake balls is surprisingly straightforward. Here’s how you do it:- Crumble Your Cake: The Foundation
Start by breaking your cooled chocolate cake into a large mixing bowl. The goal here is fine, uniform crumbs. Discard any overly large, unbaked, or burnt chunks. The finer the crumbs, the smoother your cake balls will be. You can use one or two 9-inch cakes, or even a 9x13 inch sheet cake for this recipe – adjust the binder accordingly.
- Introduce the Peanut Butter Binder: The Flavor Powerhouse
This is where the magic happens. For the ultimate chocolate peanut butter cake balls, you'll want a rich peanut butter binder. While some recipes call for elaborate fillings, a simple, delicious peanut butter frosting works wonders. If you don't have frosting on hand, you can create a quick binder by combining peanut butter with a touch of softened cream cheese and a drizzle of sweetened condensed milk, as found in some variations. The key is to add enough to bind the crumbs without making them too wet. The peanut butter's color might disappear into the chocolate cake, but its unmistakable taste will absolutely shine through. Feel free to use creamy peanut butter for a silky texture or crunchy for an added textural pop – the nuts will be a delightful surprise.
- Mix Until Combined: Getting Your Hands Dirty (or Using a Spoon)
Using a sturdy spoon, or even your impeccably clean hands, mix the crumbled cake and peanut butter binder thoroughly. You want to ensure every crumb is coated and the mixture comes together into a cohesive, moldable dough. It should be firm enough to roll without being sticky or dry.
- Roll into Balls: The Perfect Portion
Scoop out tablespoon-sized portions of the mixture and roll them gently between your palms into neat, uniform balls. Aim for consistency in size for even chilling and presentation.
- Chill for Firmness: The Essential First Rest
Arrange your newly formed cake balls on a parchment-lined baking sheet and refrigerate them for at least 45 minutes. This step is crucial, as it allows the mixture to firm up, making them easier to handle and coat in the next stage.
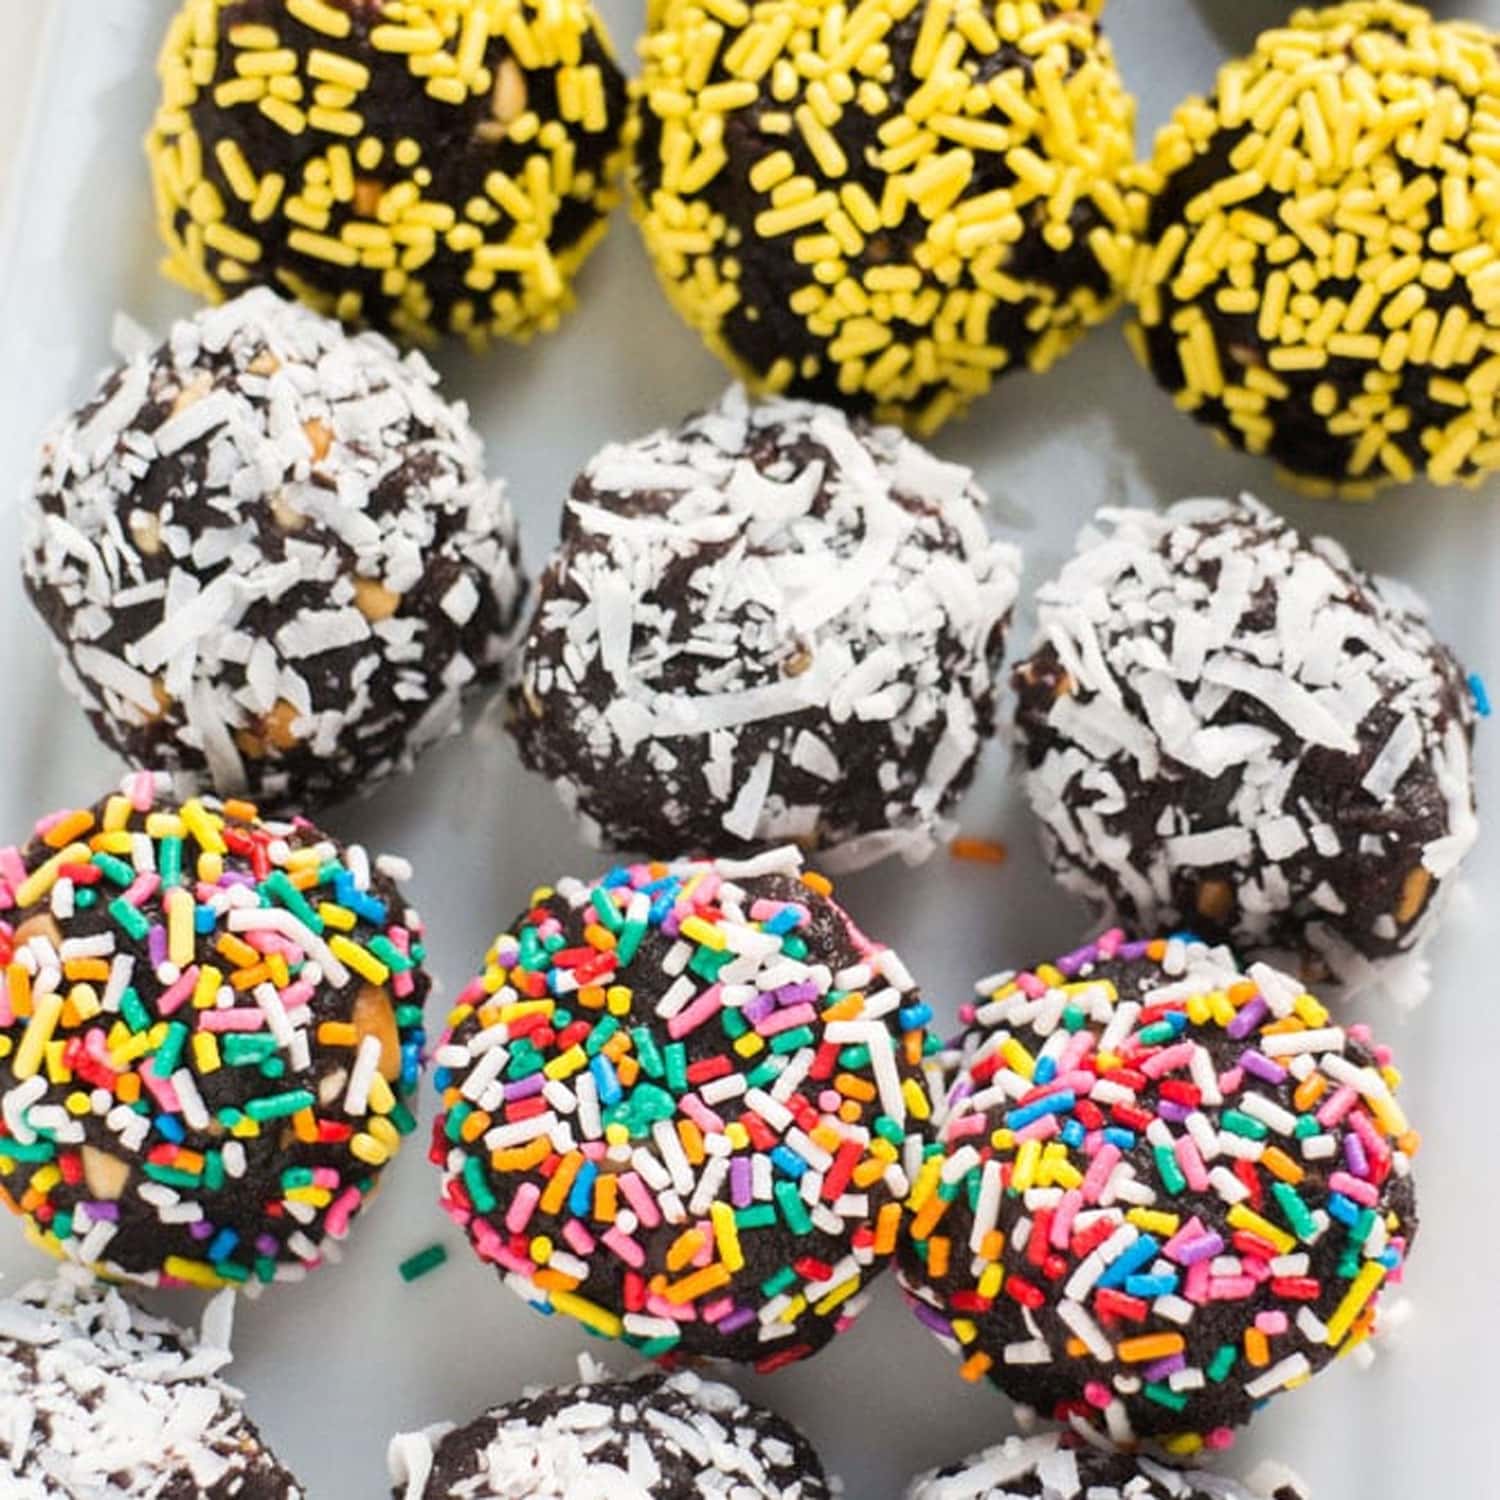
- Prepare Your Coatings: The Finishing Touch
While your cake balls are chilling, gather your chosen coating ingredients. The possibilities are endless! Think shredded coconut, powdered sugar, colorful sprinkles, finely crushed nuts (peanuts, pecans, walnuts), crushed cookies, or even melted chocolate. For a truly decadent experience, consider dipping them in melted dark, milk, or white chocolate, then drizzling with contrasting chocolate for an elegant finish. For more creative ideas on how to adapt this method, check out Beyond Broken: Flexible Cake Balls from Any Leftover Cake.
- Coat and Chill Again: The Final Polish
Once the cake balls are firm, roll each one in your chosen coating until evenly covered. Place them back on the parchment-lined sheet and return them to the refrigerator for at least another hour. This final chill helps the coatings set and further solidifies the cake balls, making them perfect for serving.
Beyond the Basics: Customization, Storage, and Prevention Tips
The beauty of chocolate peanut butter cake balls lies not just in their salvage potential, but also in their incredible adaptability.Flavor Flexibility and Binder Variations
As mentioned, almost any cake flavor can work. While chocolate is a natural partner for peanut butter, vanilla cake creates a lighter base where the peanut butter truly sings. Yellow cake, marble cake, or even spice cake can be surprisingly delightful foundations. Beyond traditional peanut butter frosting, you can experiment with binders like Nutella for a chocolate-hazelnut twist, or even a rich chocolate ganache if you want to double down on the cocoa intensity (though this deviates from the core peanut butter theme, it’s an option!).
Creative Coatings and Toppings
- Chocolate Dips: Melted chocolate (milk, dark, white, or even candy melts) offers a smooth, professional finish. You can add a tablespoon of coconut oil to your melting chocolate for a thinner, glossier dip.
- Drizzles and Swirls: After dipping, drizzle with a contrasting melted chocolate or a swirl of peanut butter for an artistic touch.
- Textural Delights: Beyond nuts and coconut, consider crushed pretzels for a salty-sweet crunch, mini chocolate chips, or even finely crushed hard candies.
Storage Solutions
These delightful treats are fantastic for making ahead. You can serve them immediately after their final chill, or store them in an airtight container in the refrigerator for up to a week. For longer enjoyment, chocolate peanut butter cake balls freeze exceptionally well. Pop them into a freezer bag once they're fully set, and they'll keep for up to 3 months. Thaw them in the refrigerator or enjoy them straight from the freezer for a surprisingly delicious frosty bite – kids especially love this!
Why Your Cake Might Have Crumbled (and How to Prevent It Next Time)
While embracing a cake disaster is fun, understanding why it happened can help you avoid it in the future:
- Under-baking: The most common culprit. A cake that isn't fully cooked through will lack structural integrity and fall apart easily. Always check for doneness with a toothpick inserted into the center.
- Improper Pan Prep: Not greasing and flouring your pan adequately (or lining with parchment) can lead to the cake sticking and tearing when you try to remove it.
- Flipping Too Soon: Cakes need time to cool and set in the pan before being inverted. Flipping a hot cake can cause it to break.
- Opening the Oven Door Early: A sudden temperature change can cause delicate cakes to collapse, especially early in the baking process.
- Incorrect Ingredient Ratios: Too much leavening or not enough flour can affect a cake's structure. Always measure ingredients precisely.
